How to Install a Programmable Thermostat

Why Upgrade to a Programmable Thermostat?
Learning how to install a programmable thermostat can significantly improve your home's energy efficiency. Old manual thermostats often lead to energy waste and fluctuating temperatures. Programmable thermostats maintain steady temperatures, reducing the runtime of your HVAC system. This is particularly beneficial in regions like the Northeast, where temperatures can vary widely between day and night.
Step-by-Step Installation Guide
Here's a detailed guide to help you replace your old thermostat with a new programmable model:
- Turn off power at the furnace/air handler breaker and verify the old thermostat screen goes blank.
- Remove the thermostat faceplate. It should pop off easily, but if it resists, check for a hidden screw underneath.
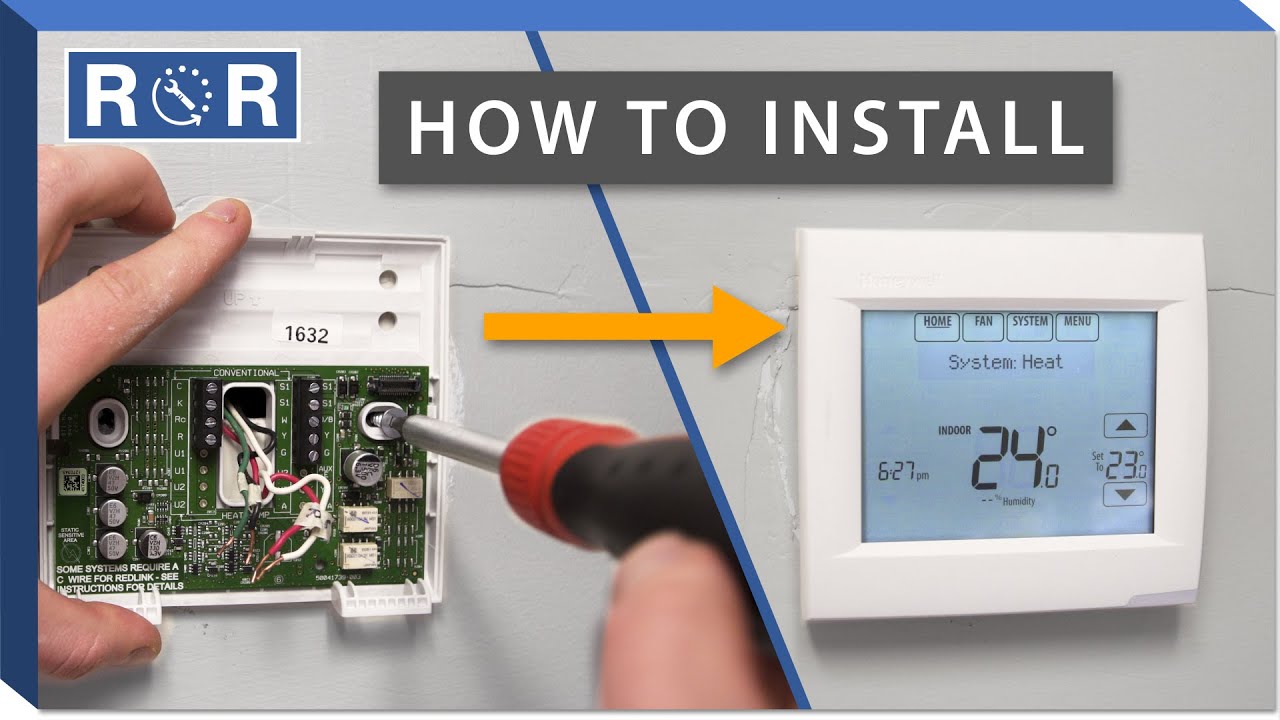
- Photograph the wiring clearly to use as a reference.
- Label each wire using the included stickers (R, W, Y, G, C). Trust the terminal letters, not the wire colors.
- Unscrew and remove the old base, holding the wires to prevent them from falling into the wall.
- Check for a C-wire (common). If absent, consider a battery-powered model or use a C-wire adapter.
- Mount the new base level. Ensure it sits flush; if it rocks, adjust your anchors.
- Insert wires into matching terminals, ensuring a firm stop to prevent intermittent issues.
- Snap on the thermostat, restore power, and follow setup prompts.
- Test the heating and cooling systems. You should hear a soft click, and the system should start within 30–60 seconds.
📺 Watch: How to How To Install A Programmable Thermostat
🎥 How To Install Replace A Thermostat — by StatUpBox (4:01)
Tools and Materials Needed
- Klein Tools NCVT-3P non-contact voltage tester
- Husky 6-in-1 screwdriver
- Drill with 3/16" bit (for drywall anchors)
Consider these product recommendations for your installation:
- Honeywell Home RTH7560E 7-Day Programmable Thermostat
- Google Nest Thermostat (2020)
- Everbilt #6 drywall anchors kit
Not sure what's wrong?
Describe your problem to homemd.ai for a free diagnosis.
Get Your Free DiagnosisCost Comparison
| Option | Cost |
|---|---|
| DIY Installation | $50–$130 |
| Professional Installation | $150–$300 |
When to Call a Professional
Consider hiring a professional if you encounter high-voltage wiring (thick wires with wire nuts) or if your system is multi-stage/heat pump and the wiring doesn’t match standard labels.
FAQs
Do I need a C-wire?
Not always. Battery models don’t. Smart thermostats usually do—without it, they’ll behave erratically.
What if my wires don’t match labels?
Use the terminal letters from the old thermostat, not wire colors. If there are extras (like O/B), you may have a heat pump.
Why isn’t my system turning on?
Most often: loose R wire or missing Rc/Rh jumper. You should feel each wire click firmly into place.
Can I install this in an older home?
Yes—but homes pre-1980 may lack a C-wire. Adapter kits solve this without running new cable.
Will this save money in the Northeast?
Yes—set back temps at night (5–8°F). You’ll notice longer, steadier run cycles instead of constant short cycling.
Related Guides
AC Not Cooling? What to Check Before Calling HVACFurnace Not Heating? What to Check Before Calling HVACFurnace: Repair or Replace in 2026?HVAC Technician Rates: Fair Hourly Charge in 2026Not sure which parts to buy?
Describe or photo your problem. HomeMD.ai tells you the exact Home Depot products you need — with prices.
Find My Parts Free